PC assembly: A complete guide to building your computer
PC assembly is an exciting adventure, offering many advantages. This guide will walk you through the process of creating a custom pc configuration. At Syscom-Prorep, specialists in electronic solutions, we understand that building your own computer can seem daunting. However, with the right advice, this project becomes accessible to everyone.
By choosing your pc components, you control every aspect of your machine. From processor to graphics card to storage, each element will be selected to meet your specific needs. This process will not only save you money, but also give you an in-depth understanding of how your computer works.
Whether you're a student, a gamer or a professional, this guide will help you build the ideal PC assembly. We'll cover every step, from preparation to final installation, including the right choice of components. Get ready to dive into the fascinating world of PC assembly!
Key points to remember
- PC assembly for total customization
- Potential savings of 50% compared with pre-assembled PCs
- Choice of components tailored to your specific needs
- Potential for future evolution and updating
- In-depth understanding of how your computer works
- Project accessible even to beginners with a good guide
- Personal satisfaction in creating your own machine
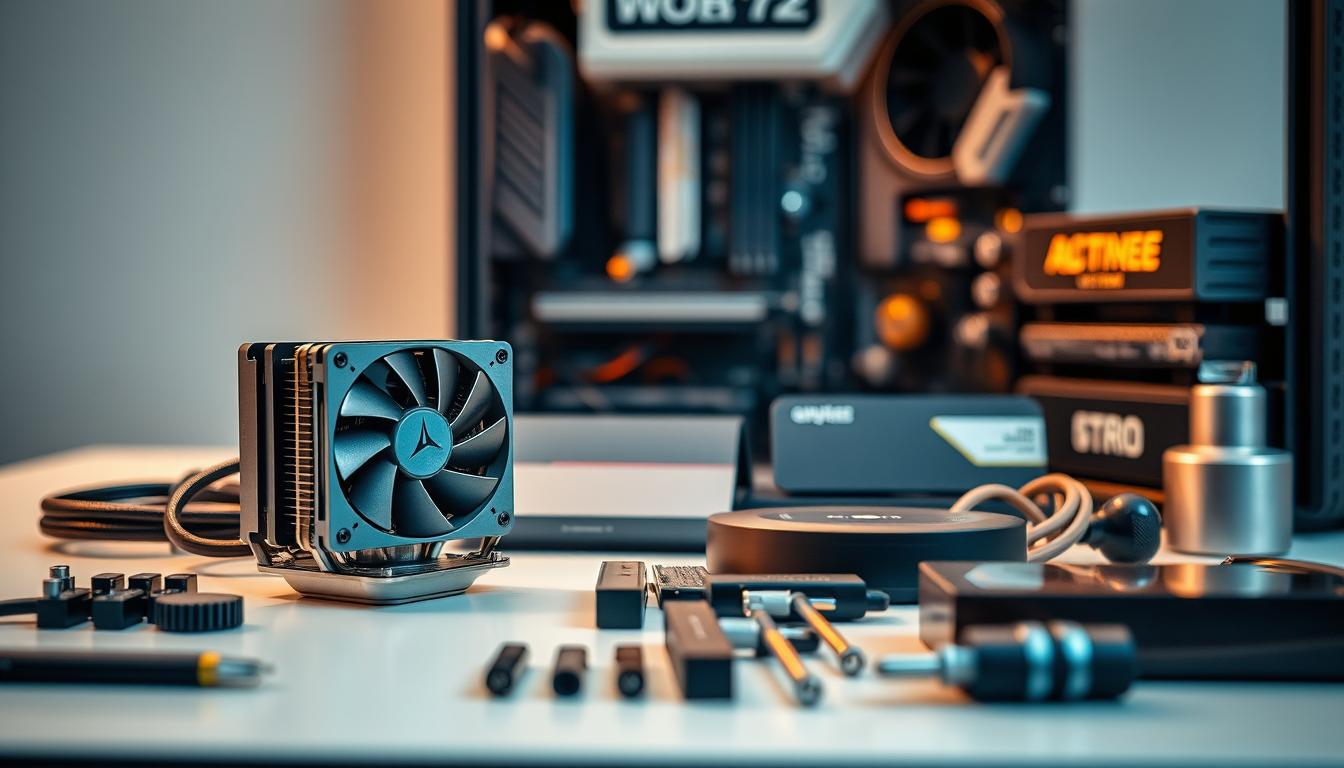
Preparation and tools required
Before you start assembling your computer, careful preparation is essential. Proper preparation will greatly simplify the building process. It will also prevent you from making costly mistakes.
List of essential tools
For a successful computer installation, certain tools are essential:
- Phillips and flathead screwdrivers
- Long-nose pliers
- Quality thermal paste
- Antistatic wristband
- Cable ties
A specialized tool kit, like the one from StarTech.com, can be very useful for assembly.
Optimum workspace
Choose a clean, well-lit workspace for your construction. Avoid synthetic surfaces and carpets, which can cause static electricity. A large workspace will help you keep your components in order.
Anti-static precautions
Static electricity is a risk during assembly. Wear cotton clothing and discharge yourself by touching a metal object before handling components. An antistatic wristband offers additional protection.
Once these preparations have been made, you'll be ready to start your computer assembly with confidence. The next step is to select the key components for your new computer system.
Choice of essential components for pc assembly
The creation of a custom-built PC requires careful selection of each computer component. The quality and compatibility of these parts directly influence the computer's performance. Each component plays a crucial role in the overall efficiency of the machine.
The motherboard, the pillar of the system
The motherboard is the computer's core. It acts as a hub, connecting all other components and determining their compatibility. It's essential to choose the right motherboard for the processor and RAM you plan to use.
The processor, the computer's brain
The processor plays a decisive role in computer performance. Its frequency, expressed in GHz, determines processing speed. A more powerful processor ensures higher performance, but increases energy consumption.
Memory and storage
The computer's multitasking capacity is directly influenced by the amount of RAM. It's advisable to choose the right amount for your needs. For storage, an SSD offers six times the speed of a conventional hard disk.
Power supply and enclosure
A quality power supply is essential to ensure system stability. The case, meanwhile, protects components and manages cooling. It's important to select these elements according to configuration and performance requirements.
Installing the processor and ventirad
Installing the processor is a fundamental step in setting up your pc configuration. It's essential to handle components with care to avoid damage. Start by carefully opening the motherboard socket tray, using the metal lever.
Then remove the socket protector. Align the notches on the processor with those on the socket. Hold the processor by the edges and gently insert it without forcing. Once in place, close the cover and lock it in place.
Then apply a small amount of thermal paste to the center of the processor, equivalent to a grain of rice. For the ventirad, follow these steps:
- Install the backplate on the rear of the motherboard
- Place the spacers around the socket
- Place the ventirad on the processor, aligning it with the spacers
- Tighten nuts evenly by hand
Don't forget to remove the protective film from the coldplate before installation. Finally, connect the ventirad fan to the "CPU_FAN" socket on the motherboard. Check that everything is securely fastened to ensure optimum cooling of your pc parts.
RAM memory assembly
Installing the RAM memory is a fundamental step in the process of assembling your PC. Before you begin, it is imperative to disconnect your hardware from the mains. This prevents any potential electrical hazard.
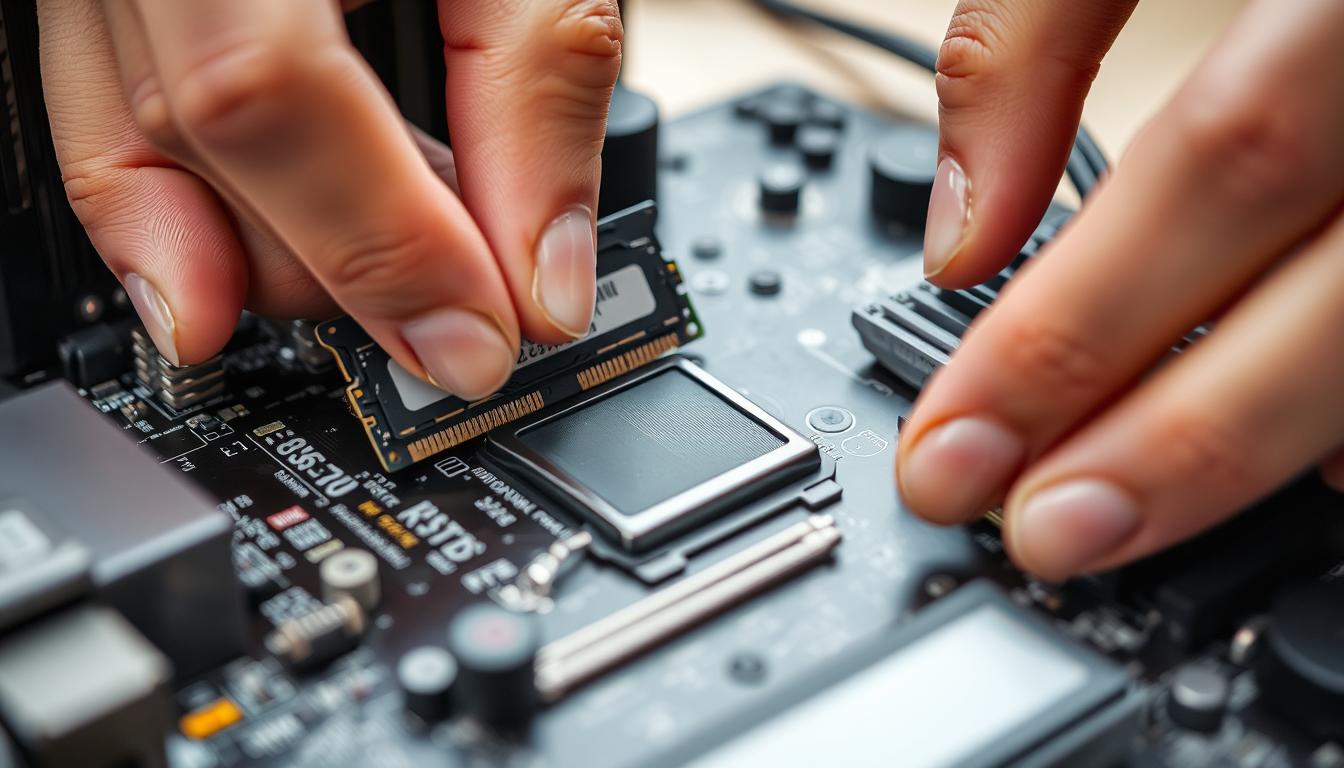
Memory slot identification
For a successful installation, it's essential to locate the RAM slots on your motherboard. These slots are usually located close to the processor and can be identified by their color. To determine the optimum slot configuration, consult your motherboard manual.
Correct insertion technique
Hold the RAM strip by the sides, avoiding touching the gold contacts. Align the notch on the strip with the notch in the slot. Apply uniform pressure of about 15 kg to insert the module. An audible click indicates successful insertion.
Installation check
After installation, check that the slot latches are securely closed. Then close the assembled PC case and boot up the computer. Use tools such as CPU-Z to confirm that the new RAM is detected and operating at nominal speed.
- Wear an antistatic wristband to protect your components
- Install identical strips for optimum compatibility
- Enable XMP profile in BIOS for maximum performance
By following these steps, you'll successfully install the RAM memory in your assembled PC. This is a crucial step in optimizing the performance of your hardware.
Storage system installation
The installation of computer storage components is essential when building a PC. It's crucial to consider the different types of storage, such as M.2 SSDs and SATA drives, when assembling.
Mounting M.2 SSDs
M.2 SSDs are distinguished by their exceptional speed. To install them, follow these steps:
- Locate the M.2 slot on the motherboard
- Insert the SSD at a 30-degree angle
- Secure with the supplied screw
Installing SATA disks
For SATA drives, proceed as follows:
- Slide the disc into the HDD cage on the case
- Secure it with the screws supplied
- Connect SATA cables to motherboard and drive
Data cable configuration
Proper cable management is crucial for good airflow. Use cable ties to hold them in place. Make sure SATA connectors are correctly plugged into the motherboard.
Please consult your user manual for specific instructions for your configuration. Correct installation of storage systems will ensure optimum performance for your assembled computer.
Inserting the motherboard into the case
Installing the motherboard is a crucial step in the creation of a custom-built PC. This key component must be handled with care to avoid damage during assembly.
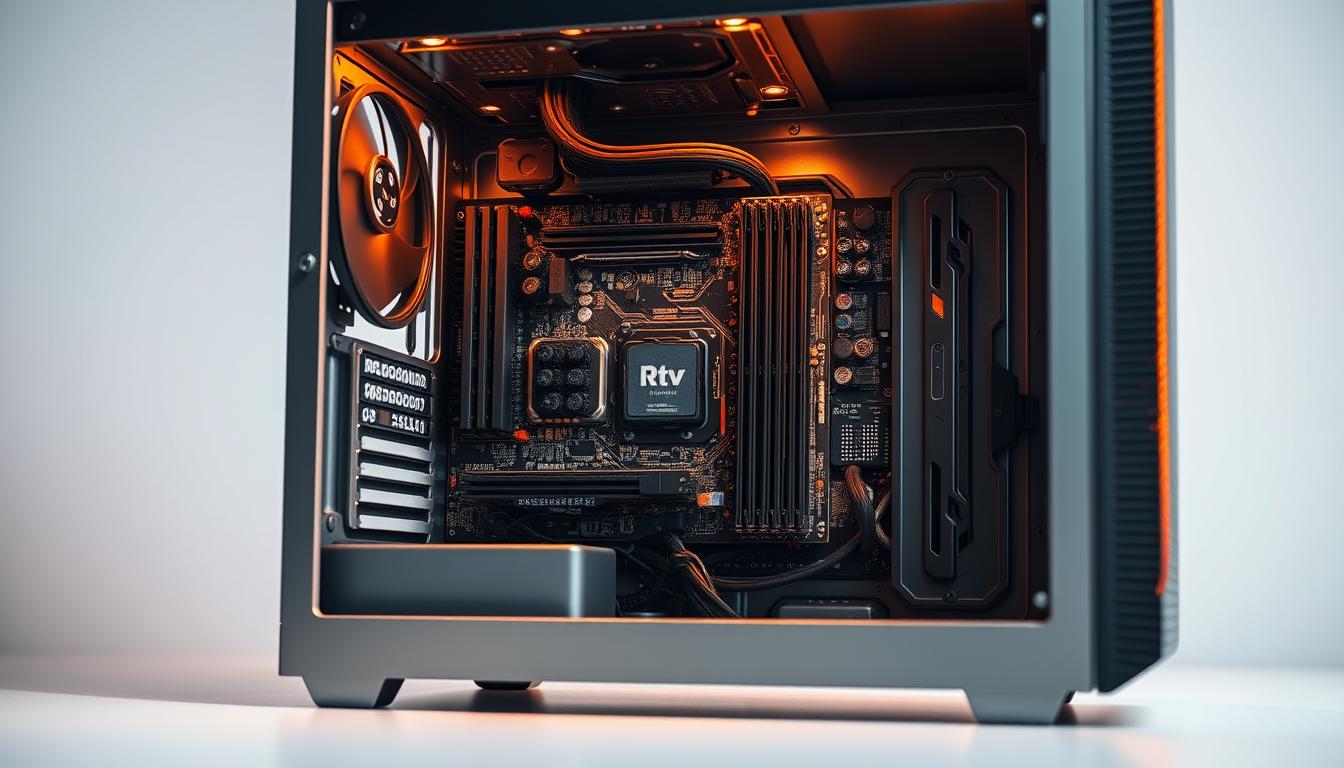
Before you start, make sure that the ATX cover is correctly clipped in place. Check that the spacers are correctly screwed into the appropriate positions in the case. Move all cables out of the way to clear the workspace.
Hold the motherboard by the edges to avoid damaging it. Tilt it slightly to fit the connectors into the ATX cover. Carefully place it on the spacers, making sure that the mounting holes are aligned.
Use the screws supplied to secure the motherboard. Don't forget to place a washer between the screw and the board. Don't overtighten to avoid damaging the circuitry. If necessary, try different screw sizes to find the right fit.
Once the motherboard has been secured, check that all external ports are correctly aligned with the openings in the case. This step is essential to ensure a functional and accessible pc configuration.
By following these instructions, you'll have laid a solid foundation for your custom pc. The next step is to install the additional components to finalize your custom pc configuration.
Cooling system installation
Cooling plays an essential role in the performance of your PC. The right system is essential to maintain optimum performance and extend component life. Here are the key steps to efficient cooling installation.
Fan positioning
It's crucial to position the fans strategically in your case. Place them at the front for fresh air intake. At the top and rear, they should discharge hot air. This arrangement ensures optimum air flow to cool your hardware.
Airflow management
Good airflow is essential for a high-performance PC. Make sure cables are neatly arranged so as not to impede airflow. Clean fans and grilles regularly to maintain optimum airflow.
Watercooling installation
For advanced cooling, watercooling is an ideal option. Check compatibility with your motherboard and case. Clean the CPU, apply thermal paste and carefully align the pump block. Tighten the screws diagonally and connect the cables to the right ports. A watercooler like the ArcticLiquid Freezer 240 offers quiet, efficient cooling, ideal for high-performance PCs.
A properly installed cooling system is the key to a successful PC assembly. Take the time to do it properly to ensure the longevity and performance of your hardware.
Connections and wiring
The cabling stage is crucial in computer assembly. Careful cable management improves the aesthetics and optimizes the cooling of your pc construction.
Power supply connections
Start by connecting the main 24-pin connector to the motherboard. Then locate the 8-pin (4+4) CPU connector and insert it into its dedicated slot. Check that these connections are firmly seated to ensure system stability.
Motherboard cables
Identify the front panel connectors (power, reset, LED) and connect them according to your motherboard manual. Beware of USB 3.0 connectors, which are fragile. For audio, use HD audio connectors.
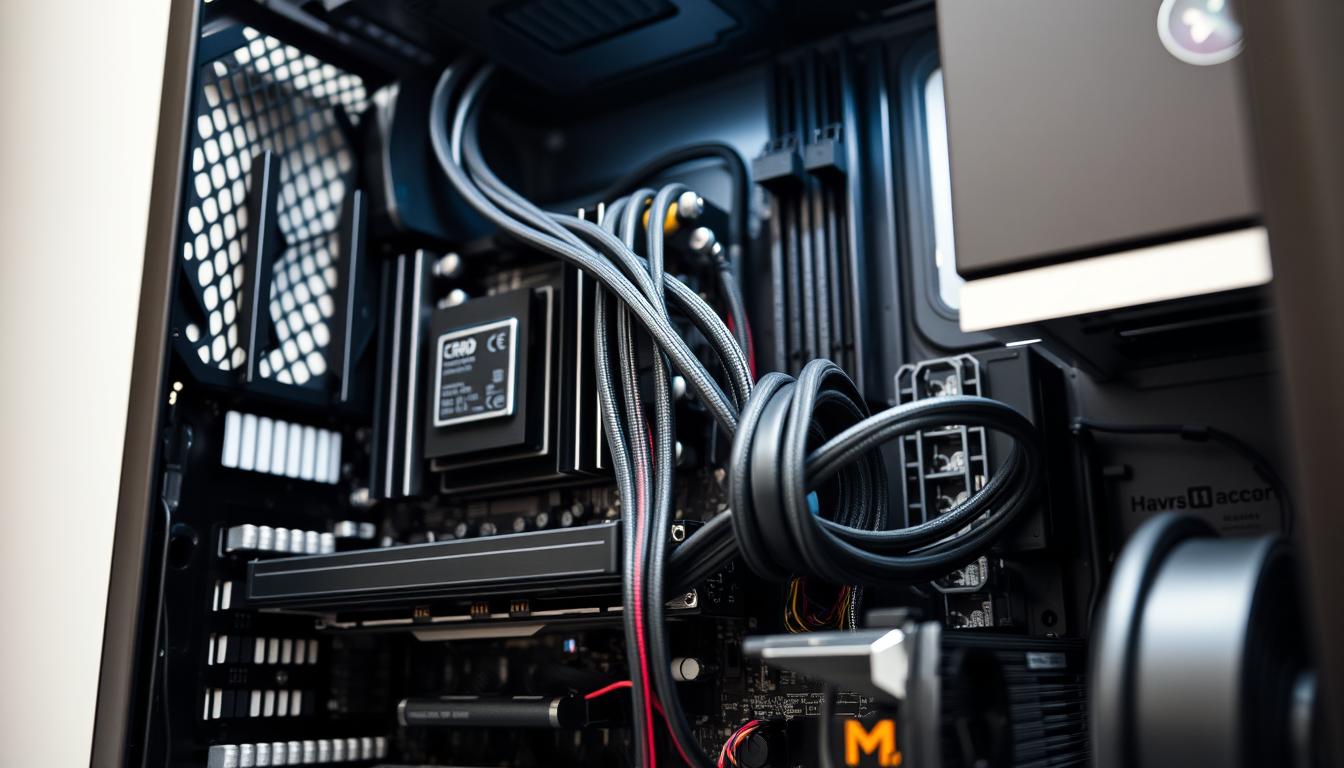
Peripheral cable management
Organize your cables for clean pc assembly:
- Use the back of the box to route cables
- Group cables with cable ties
- Avoid blocking fan airflow
Well-managed cabling can reduce your system temperature by 4-5°C, improving the performance of your IT components.
Graphics card installation
Installing the graphics card is a decisive moment in the creation of a custom-built PC. This component, often the largest and most expensive, is crucial to the performance of your configuration. It plays an essential role in the user experience.
To begin, switch off and unplug your computer. Open the case to access the card slot. If you're replacing an old card, remove it carefully. Locate the PCIe x16 slot on your motherboard, usually the longest.
Align your new card with the PCIe slot. Insert firmly until you hear a click. Attach the back plate to the case. If your card requires an additional power supply, connect the required 6- or 8-pin cables.
Once the physical installation is complete, close the box. Reconnect all cables and boot your PC. To finalize, install the drivers from the manufacturer's website. Perform a stress test to check the stability of your new pc.
- Check size compatibility (up to 30 cm long)
- Make sure you have a suitable enclosure (some cards occupy 3.5 slots)
- Use the PCIe 4.0 x16 slot for better performance
By following these steps, you'll be able to perfectly integrate your graphics card with your custom-built PC. This will optimize your configuration for gaming or demanding professional tasks.
Conclusion
PC assembly is an exciting adventure, taking around two hours to complete. This process allows you to design a unique PC configuration, perfectly adapted to your needs. Each component, carefully selected, contributes to the creation of a tailor-made machine, guaranteeing exceptional performance.
To ensure the longevity of your creation, place it in a well-ventilated environment. Make sure you leave 5-10 cm of space at the sides and 15-20 cm at the back. Avoid placing it on the floor to prevent dust accumulation. Regular maintenance, such as vacuuming every six months, will contribute to its longevity.
If assembly seems daunting, professionals like Syscom-Prorep can help. Whether you choose to build or buy, the most important thing is to get a computer that meets your expectations. Building offers the possibility of customization and potential savings. Buying, on the other hand, brings convenience and guarantees. Now you're ready to explore the fascinating world of computing!
FAQ
What are the advantages of PC assembly over buying a prefabricated computer?
PC assembly offers several notable advantages. It offers better value for money and full customization. You can also easily upgrade your components in the future. This approach gives you a better understanding of how your computer works. What's more, it's a rewarding experience that helps you acquire new skills.
What tools are needed to build a PC?
To mount a PC, you'll need a Phillips screwdriver and needle-nose pliers. An anti-static wrist strap and cable ties are also essential. A headlamp can be useful. Make sure you have a clean, well-lit work area to facilitate assembly.
How do I choose compatible components for my PC configuration?
To choose compatible components, start by selecting the right motherboard for your processor. Then check the compatibility of RAM memory, case and power supply. Online tools like PCPartPicker can help you check compatibility between components.
What's the difference between SSD and HDD storage?
SSDs offer much faster read and write speeds than traditional HDDs. This translates into shorter boot-up and load times. However, HDDs generally offer more storage capacity at a lower cost.
How do I correctly apply thermal paste to the processor?
Apply a small amount of thermal paste, about the size of a grain of rice, to the center of the processor. The weight of the ventirad will distribute the paste evenly during installation. Avoid applying too much paste, as this may impair thermal performance.
How do I manage the cables in my enclosure?
For good cable management, use the cable glands on the housing. Bundle cables with cable ties. Try to route them behind the motherboard mounting plate. This improves aesthetics and airflow inside the case.
Which power supply should I choose for my configuration?
The power you need depends on your components, in particular your processor and graphics card. Use an online power calculator to estimate your needs. Choose a power supply with an extra 20-30% margin to ensure stability and allow for future upgrades.
How can I optimize the cooling of my assembled PC?
For optimum cooling, make sure you have a good balance between inlet and outlet fans. Generally place inlet fans at the front and bottom of the case, and outlet fans at the back and top. Also consider watercooling for more efficient CPU cooling.
What should I do if my PC won't boot after assembly?
First, check all connections, especially the power supply. Make sure the RAM is correctly installed and that the CPU is correctly positioned. If the problem persists, try booting with the minimum number of components (motherboard, CPU, one RAM strip) to isolate the problem.
Is it possible to customize a PC configuration for specific needs such as gaming or video editing?
Absolutely! This is one of the main advantages of PC assembly. For gaming, opt for a good graphics card and a high-performance processor. For video editing, opt for a powerful multi-core processor, lots of RAM and fast storage. Always adapt your configuration to your specific needs.